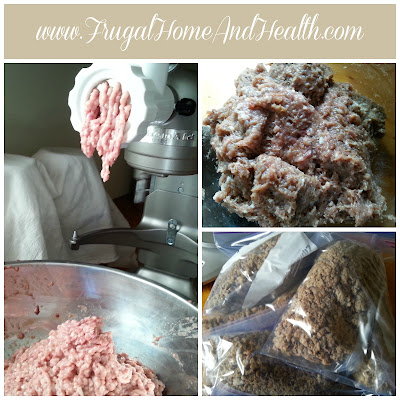
When we butchered chickens a few months ago we marked two for turning in to sausage. I already have my sausage recipe on here, but formerly I've always used ground turkey from the store. Using my handy, dandy, Kitchen-Aid grinder attachment, I turned those two chickens (and the organ meats from about 10 chickens) into sausage. A word about that real quick - it would have been much easier if the meat and organs were slightly frozen still. Also, as per the book's instructions, I cut the meat into thin strips and that did help a lot. I started on the courser grind and then ran it all through one more time in the finer grind. It took longer than I thought. Next time (turkeys?) I will be a lot more prepared.
Here is a photo of the meat and organs going through the grinder, a photo of the seasonings all mixed up into the ground meat, and a photo of what I did with some of the sausage (browned it and froze in meal-size portions for biscuits and gravy, scrambled eggs with sausage and peppers, pizza soup, etc.).
For the eggs, it is very convenient to have a 'muffin top pan' (be sure they are large enough! You should be safe with a 6-cup muffin top pan), however you may also use whatever you have on hand, such as small pyrex bowls, soufflé bowls, etc. The key is, it helps to have them well greased for easy release. Also, cooking at too high of a heat or over-cooking will cause them to bake on to the bowls and be hard to remove. Simply break one egg into each muffin top cup or other bowl, break the yolk, shake on a little salt and pepper if you like, and bake at 350* until set (10 minutes or less). Again, if you over-bake it or bake it at too high of a temperature it will be hard to remove! Slide a rubber/silicon spatula around and under the egg and allow it to cool on a wire rack before assembling your sandwiches. Repeat until you have all the eggs you need.
Now you will need the remaining ingredients. You may use store-bought or homemade English Muffins or biscuits. I prefer homemade sourdough English muffins or sourdough biscuits. You might also prefer cheese on yours. For this batch we got a great deal on (expired) organic raw cheddar so that's what we used. You might also prefer to add butter to insides of the bread. Assembling is common sense :) Once all of the sandwiches are made, wrap each one in parchment paper (so the aluminum foil is not touching your food) and then in foil. Keep all in a freezer bag or other freezer container until ready to use. If you think you are going to use several at once, store as many as you will need in a foil roasting pan. We only use a few at a time so I just keep mine all separate but together in a plastic freezer bag.
To heat: If you have them in a foil roasting pan, just pull that out of the freezer and put it right into the oven. Or put as many as you need into a covered dish of some kind. Heat at 350* until heated all the way through (25-30m or so). Obviously if you remember to take out what you need the night before it will heat up much quicker!! If you only need one or two, it's best to heat in a toaster oven. Of course you may use a microwave ... but we don't ... so I cannot counsel you on that one with confidence but I'll guess: remove the foil but not the parchment paper. Zap it for a half a second and it's done. Or something like that.
We really, really like having these things on hand! Especially with the cold months coming up, the wood cookstove will be on again (once we move it!!) and these are so handy to just throw right into the wood cookstove oven.


No comments:
Post a Comment
Comments are moderated - I will get to them as soon as possible. Thank you!